This is my skirt that I done for our previous brief Unit 3 Ideas & Concepts... :) My theme was Spring and my concept was New Life...
I choose a flower because it is reminds me of Spring and the design of my skirt is a bun of a flower that slowy opening... :)
 To make this skirt, I first started my design by drawing the front and back skirt block as my first draft...
 The picture above is the font skirt block...
 The picture above is the back skirt block...
The picture below is my second draft of the skirt... I reduce the legnth of the skirt a few inches below the hip line... This would be the first and inner layer of the petal on the skirt (A)...
 The picture above shows the legnth of the skirt...
I then traced the skirt block above and made the skirt legnth even shorter than the first one... This would be my second and outer layer of the patels for my skirt (B)...
 From the 'A' pattern I made a petal by making sure the legnth is the same as the 'A' pattern... I also add the dart to convey the line on the flowers from the middle part of the flower...
 From 'B' pattern I draw the outer layer making sure it is the same legnth as the 'B' pattern...
 After making the petal draft I add 1.5cm seam allowance around the petal of the inner petal...
 I also add 1.5cm seams allowance around the outer petal...
 The image below is the inner petal of the centre back of the skirt... I cut it in the middle so I could add the zipper... I also add a 1.5cm seams allowance around the pattern as well as the middle part of the petal...
 I then cut around the pattern making sure I follow the seams line...
The image below shows what the pattern looks like after I cut around the pattern...
 I did the same step on the outer petal pattern...
 I did the same step on the outer petal pattern...
The image below is what the petal looks like after being cut...
 The image below is a fabric call calico... :)
 The image below is a fabric call calico... :)
Calico is a cheap fabric use to make a draft of a garment... While on the process of making the garment, we sometimes notice flaws or we don't agree with the outcome of the garment... Using calico can helps us see does flaws and we can easily change the pattern block and make the garment without wasting the actual fabric we want to use for the garment... :) I hope that helps what calico is for...
 I placed the pattern on top of the calico and secure the pattern for moving while cutting by a pin... I then cut all around the pattern making sure I don't cut around the paper pattern...
 Before removing the pins around the pattern I put a pin at the bottom of the dart and cut at least 1cm on the notches...
The notches that I was on about is the top part of the dart... :)
 I gently remove the paper pattern making sure I do not moved the pin from its place...
 This is the close up picture of the bottom of the dart... As you can see there is an 'X' mark where the pin is... This mark would help me identify where the dart finish once I removed the pin... I also put an 'X' mark on he back of the fabric where the pin goes through...
 I took a close up picture of the cut that I done on the notches, just to show you what it would look like... :)
 After cutting all the pattern and making marks on them... The picture below shows the finish cut pattern of the inner petals...
 The picture below is what the centre back petal looks like...
 The picture below is how I was about to start to sew the darts on the calico... I start of by matching the notches together and fold it where the 'X' mark is...
 The image below shows you how I was sewing the dart to the 'X' mark... As you can see the dart is not a straight line but slightly parallel...
 The picture below is to show you what all the finish sewed darts... As you can see there is more fabric from the finish cut of the petal picture... That's because I cut two piece of fabric in each pattern... I'll show you why I done that in a few mins... :)
 I placed each fabric on the ironing board and I Iron the darts...
 The image below is what the darts look like after being iron to one side...
 After ironing all the darts on the inner petals, I place to fabric together making sure the right side is facing each other and sew a 1.5cm seams allowance... The image below shows you what it look like after sewing the seams...
 To reduce the bulk around the curve I cut a straight line around it first making sure to leave at least 1-2mm from the seam (the seam is the red thread) then I cut around it making sure to leave atleast 3mm gap to the seam... After doing that to all the petals I put them inside out...
 The picture below is what the petal look like once the right side is out... You can clearly see that around the curve there is no bulk but just a smooth curve...
 The picture below shows you how I start to sew the cebtre back... This time I didn't start from the waist line but on the buttom curve...
 As you can see on the picture below I am follow the curve, making sure to leave a 1.5cm seams allowance... The masking tape on the bed of the flat-bed machine is my guide to make sure it is a 1.5cm seam allowance...
 The image below is to tell you what it should look like after being sew... You have to repeat this to the other side of the centre back petal...
 After sewing all the inner petals I shorten a zip...
 I gently remove the paper pattern making sure I do not moved the pin from its place...
 This is the close up picture of the bottom of the dart... As you can see there is an 'X' mark where the pin is... This mark would help me identify where the dart finish once I removed the pin... I also put an 'X' mark on he back of the fabric where the pin goes through...
 I took a close up picture of the cut that I done on the notches, just to show you what it would look like... :)
 After cutting all the pattern and making marks on them... The picture below shows the finish cut pattern of the inner petals...
 The picture below is what the centre back petal looks like...
 The picture below is how I was about to start to sew the darts on the calico... I start of by matching the notches together and fold it where the 'X' mark is...
 The image below shows you how I was sewing the dart to the 'X' mark... As you can see the dart is not a straight line but slightly parallel...
 The picture below is to show you what all the finish sewed darts... As you can see there is more fabric from the finish cut of the petal picture... That's because I cut two piece of fabric in each pattern... I'll show you why I done that in a few mins... :)
 I placed each fabric on the ironing board and I Iron the darts...
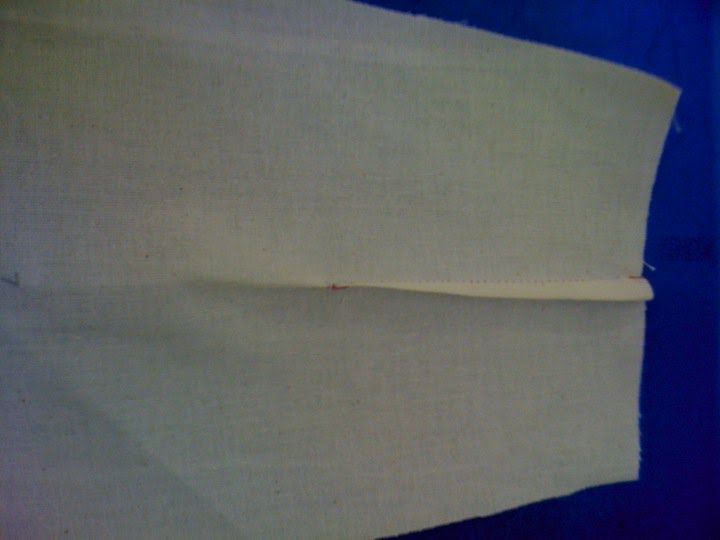 The image below is what the darts look like after being iron to one side...
 After ironing all the darts on the inner petals, I place to fabric together making sure the right side is facing each other and sew a 1.5cm seams allowance... The image below shows you what it look like after sewing the seams...
 To reduce the bulk around the curve I cut a straight line around it first making sure to leave at least 1-2mm from the seam (the seam is the red thread) then I cut around it making sure to leave atleast 3mm gap to the seam... After doing that to all the petals I put them inside out...
 The picture below is what the petal look like once the right side is out... You can clearly see that around the curve there is no bulk but just a smooth curve...
 The picture below shows you how I start to sew the cebtre back... This time I didn't start from the waist line but on the buttom curve...
 As you can see on the picture below I am follow the curve, making sure to leave a 1.5cm seams allowance... The masking tape on the bed of the flat-bed machine is my guide to make sure it is a 1.5cm seam allowance...
 The image below is to tell you what it should look like after being sew... You have to repeat this to the other side of the centre back petal...
 After sewing all the inner petals I shorten a zip...
To do this you have to get a thread and a needle and sew around the teeth of the zipper... The legnth can be any as you please... Sew for five times around the zipper teeth and secure it before cutting the other end of the zipper that you please to dispose...
 After shorting the zip you must overlock the middle of the centre back petal (both piece)...
 After shorting the zip you must overlock the middle of the centre back petal (both piece)...
 I put both centre back petal peace together and sew from the bottom of the petal to the mark... You must be wonderingwhat mark I'm on about... Before sewing the seam, you have to place the zipper onto the fabric, making sure the top of the zipper is line on the waist line of the petal... From your new stooper you make 2cm above or in other word going to the waist line... you can see there is a black small horizontal line on the calico...if you cant see it, its on your left side like a 1cm going right from the end of the picture... :) You only sew from the bottom to that mark...
 From where you finish to sew the rest would be a tacking... The black broken line going from the mark to the waist line is the tacking...
 Press the seam open and place the zipper on the calico... This image is taken before I realize my mistake... You must line the top of the zipper to the waist line before sewing the zipper to the calico... Before sewing make sure the back of the zipper is looking up... To sew the zipper you must change the foot of your flat-bed machine or domestic machine to a zipper foot...
 The image below is taken after I sew the zipper in place... You must then turn the petal facing the right way of the petal towards you... Around the middle you must sew 1cm from the waist line, stopping to the mark or where your tacking stop...
 This is a close up picture of what the the step above should look like... After putting the 1cm top stictch you must unpick the tucking... After you done this you are finish with the inner petal...
 After doing the inner petal you must repeat the steps from sewing the darts to taking the bulk and turn the petals the right way around to the outer petals...
  The image below is the sequins that I choose to use to create the features on each inner and outer petals... This will represent the drops on my design...
 I sew one of the sequins onto the fabrics just to show that the thread must go on the inside of the fabric to make it look neat on the other side of the petal...
 The image below just show you that I sew the sequins between or inside the fabrics...
 This is the final look of the petal after sewwing the sequins on...
 For the centre back inner petal the steps from above those not qualify on this one... I used a diffenret technique of sewing... Since I sew the two peace together to make one whole petal sewing from the inside was quite hard because the inside does not opened up or have enough space to let my hand in...
 Because I wanted a neat finish on the front and back of each petal especially the centre back petal... I have to secure and cut the thread after sewing one sequins that going to one space to another to sew the sequins without cutting the thead and have a random line of thread on the back of the centre back petal...
 After doing the sequins I start to make a draft of my waistband... I start of measuring the waistline of each skirt pattern excluding the darts... I multiply the front and back measurement to 2 and add them together...
After I was satisfied with the legnth of the waistband I traced the dart and my new waistband pattern piece I added 1.5cm seam allowance on the side and the bottom... But before adding a seam on the right side of the waistband I added 2cm for the button holes... I also added a cut and fold sign on the top of the waistband...
 You must then overlock both bottom piece before folding both side end of the waistband to a 1.5cm to make the seam... After folding the seams press it flat with an iron or if you please you can go straight to doing a top stitcth on the side seams...


 After securing the petals I sew the outer petals to the waist band as in at the picture below...
 After sewing the outer petals to the waist band I repeat the proccess for the inner petals from securing it into place to sewing it to the waistband... The centre back petal is sewn last because the middle of the centre back petal must be sewn on both ends of the waistband... I firstly pulled the zip down and secure the petal onto place by a pin on one side then sew the petal onto place... I then place and secure the other side of the petal to the other end of the waistband before sewing the petal onto place...
  The image below is the finish sewn of a botton holes... I used a machine call Memory Craft to create the button holes... This machine is specificly for botton holes and other pattern...
 After cutting the middle part on the button hole I sewn the bottons onto place...
 From where you finish to sew the rest would be a tacking... The black broken line going from the mark to the waist line is the tacking...
 Press the seam open and place the zipper on the calico... This image is taken before I realize my mistake... You must line the top of the zipper to the waist line before sewing the zipper to the calico... Before sewing make sure the back of the zipper is looking up... To sew the zipper you must change the foot of your flat-bed machine or domestic machine to a zipper foot...
 The image below is taken after I sew the zipper in place... You must then turn the petal facing the right way of the petal towards you... Around the middle you must sew 1cm from the waist line, stopping to the mark or where your tacking stop...
 This is a close up picture of what the the step above should look like... After putting the 1cm top stictch you must unpick the tucking... After you done this you are finish with the inner petal...
 After doing the inner petal you must repeat the steps from sewing the darts to taking the bulk and turn the petals the right way around to the outer petals...
The image below shows you the outer petal... All finish and press with the iron...
 The image below is the sequins that I choose to use to create the features on each inner and outer petals... This will represent the drops on my design...
 I sew one of the sequins onto the fabrics just to show that the thread must go on the inside of the fabric to make it look neat on the other side of the petal...
 The image below just show you that I sew the sequins between or inside the fabrics...
 This is the final look of the petal after sewwing the sequins on...
 For the centre back inner petal the steps from above those not qualify on this one... I used a diffenret technique of sewing... Since I sew the two peace together to make one whole petal sewing from the inside was quite hard because the inside does not opened up or have enough space to let my hand in...
 Because I wanted a neat finish on the front and back of each petal especially the centre back petal... I have to secure and cut the thread after sewing one sequins that going to one space to another to sew the sequins without cutting the thead and have a random line of thread on the back of the centre back petal...
 After doing the sequins I start to make a draft of my waistband... I start of measuring the waistline of each skirt pattern excluding the darts... I multiply the front and back measurement to 2 and add them together...
After I was satisfied with the legnth of the waistband I traced the dart and my new waistband pattern piece I added 1.5cm seam allowance on the side and the bottom... But before adding a seam on the right side of the waistband I added 2cm for the button holes... I also added a cut and fold sign on the top of the waistband...
After I was satisfied with my pattern I cut around it and secure the pattern on the calico with the pin before cutting around them...
The image below is what the waistband should look like after cutting... As you can see the pattern is still secured on the fabric...
 You must then overlock both bottom piece before folding both side end of the waistband to a 1.5cm to make the seam... After folding the seams press it flat with an iron or if you please you can go straight to doing a top stitcth on the side seams...
I then place the outer petals the way I want them to look before placing the waistband on the waist line of the petals... I secure the petals onto the waist band by pinning it each petals to the waist band...
Make sure the right side of the waistband is facing the right way of the petals (in other word the side where the sequins is sewn)...

The image below shows you a close up of how I secured the petals...
 After securing the petals I sew the outer petals to the waist band as in at the picture below...
 After sewing the outer petals to the waist band I repeat the proccess for the inner petals from securing it into place to sewing it to the waistband... The centre back petal is sewn last because the middle of the centre back petal must be sewn on both ends of the waistband... I firstly pulled the zip down and secure the petal onto place by a pin on one side then sew the petal onto place... I then place and secure the other side of the petal to the other end of the waistband before sewing the petal onto place...
After all petals are sewn together I ask one of the tutor to give me a guide on how to continue the a neat waistband... I was told the I have to fold the other bottom hem of the waistband to the hem that was sewn onto the petals... I must then sew the unsewn hum of the waistband to the sewn hem of the waistband and the petal... After sewing the together I press the seam to one side by an iron before doing a top stitcth to sew the hems and the waist line of the petals to the waistband...
The picture below shows you the back of the skirt... The orange dot is the head of the pin to secure it before creating the bottons holes... The top stitch is also visible on this image...
 The image below is the finish sewn of a botton holes... I used a machine call Memory Craft to create the button holes... This machine is specificly for botton holes and other pattern...
 After cutting the middle part on the button hole I sewn the bottons onto place...
The picture below is the finish look of the bottons...

The End... lol... :D xx
 Hmmm... You must be wondering what's the picture above... :) Well that's a skirt... No... A skirt is not that short... :P Well unless you really want a skirt that only reach your hip and show off waaaay to much... :P :D Anyway... We only made a skirt that reach around the hip line because we are only making a facing which doesn't even reach all the way down to the hem of a skirt... hehe... It save time and fabric... :)


